WebGL for designers: how real-time 3D actually works
A designer's guide to WebGL and three.js: the mental model, the vocabulary, what each technique costs, and how to brief real-time 3D so it comes back the way you imagined.
Designers are often asked to design 3D websites without anyone explaining how real-time 3D works. The result is either timid (a spinning logo) or impossible (a film-quality render that would melt a phone). The fix isn't learning to code. It's learning the mental model and the vocabulary, so you can design what can be built and direct it until it's right.
This guide covers WebGL for designers, in design terms: what's on the stage, how light and materials work, what shaders are, what's cheap and what's costly, and how to brief a 3D scene. The examples are showcase sites made by the Laarpi team with Laarpi's library and process.
The mental model: a stage, a camera, a frame
WebGL is the browser's interface to the graphics card. Libraries such as three.js sit on top and give you a film-set vocabulary:
- The scene is the stage. Everything in it has a position, rotation and scale.
- The camera is the viewer. It has a lens (field of view), a position and a target. Moving the camera is often better than moving the objects.
- The renderer draws what the camera sees onto a canvas element in the page, again and again, ideally 60 times a second.
- The render loop is that repetition. Each pass is a frame, and at 60 frames per second each frame has about 16.7 milliseconds to finish. That number is the budget for everything below.
The important design insight: a WebGL site is not a video. Nothing is pre-rendered. Every frame is computed live on the visitor's device, which is why it can respond to scroll and cursor, and why every effect has a cost.
Objects: geometry plus material
Every visible object is a mesh: a geometry (the shape, as a net of triangles) wearing a material (how its surface responds to light).
Geometry can come from three places: built in code (spheres, planes, shapes generated by maths), loaded from a file (a model exported as glTF/GLB from Blender, CAD or a scan), or generated from data (text, terrain, graphs). Triangle count matters, but less than most people think; textures and effects usually cost more.
Materials in modern 3D are physically based. Instead of painting highlights, you describe the surface:
| Property | What it means | Design effect |
|---|---|---|
| Base colour (albedo) | The surface's own colour, without lighting | The hue you'd pick in a swatch |
| Roughness | How blurred its reflections are | Polished chrome (0) to chalk (1) |
| Metalness | Whether it reflects like metal | Metals tint reflections with their colour |
| Normal map | Fake fine detail that catches light | Brushed metal, clay ridges, fabric weave |
| Transmission / IOR | How light passes through and bends | Glass, liquids, gems |
| Emissive | Light the surface gives off | Screens, LEDs, glowing type |
Textures are images that drive these properties across a surface. Free, high-quality ones come from Poly Haven and ambientCG under CC0.
Light: the environment does most of the work
The biggest leap in quality comes from image-based lighting: lighting the scene with an HDRI, a 360° high-dynamic-range photograph of a real place. The scene inherits that place's light and reflections. A studio HDRI gives softboxes and clean highlights; an overcast sky gives soft, even light.
On top of that you can add direct lights (a sun, a spotlight, a lamp) for shadows and drama. Shadows are one of the more expensive things to render, so use them where they say something.
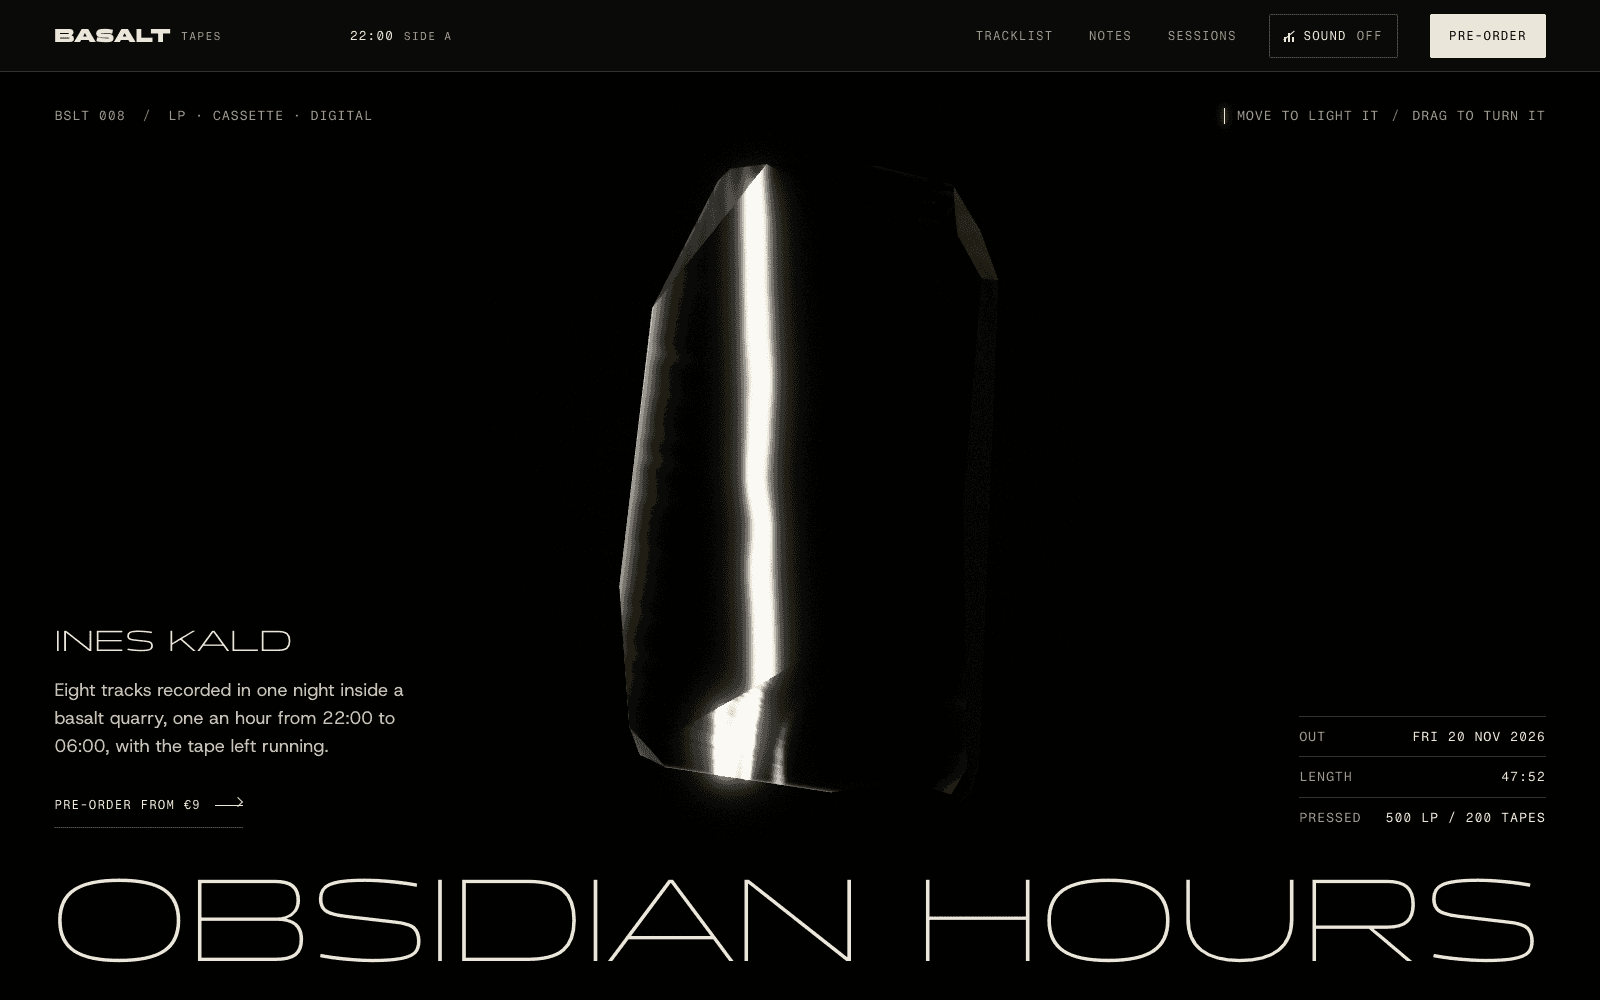
BASALT Tapes: Obsidian Hours is a showcase release page for an imagined LP. The obsidian slab is generated in code and lit by a single studio HDRI; your cursor sweeps a strip of light across its faces. Almost all of the drama is lighting and material: a black object with a hairline of light running along its edges.
Tone mapping is the last step of light: how bright values are squeezed into what a screen can show. Different tone-mapping curves give different moods, the way film stocks do. It's worth asking for by name.
Shaders: where the magic lives
A shader is a small program that runs on the graphics card, in parallel, for every point or pixel, every frame.
- A vertex shader runs for every point of a geometry and decides where it goes. Waves in a flag, a blob that breathes, type that melts.
- A fragment shader runs for every pixel and decides its colour. Gradients, grain, glass, ink, light.
Here is a whole fragment shader that fades from one colour to another across the screen, with a little film grain:
uniform vec2 uResolution;
uniform float uTime;

float hash(vec2 p) { return fract(sin(dot(p, vec2(12.9898, 78.233))) * 43758.5453); }

void main() {
  vec2 uv = gl_FragCoord.xy / uResolution;
  vec3 ink = mix(vec3(0.02, 0.04, 0.05), vec3(0.27, 0.94, 0.82), uv.y);
  float grain = hash(uv * uResolution + uTime) * 0.06;
  gl_FragColor = vec4(ink + grain, 1.0);
}
You don't need to write this; how to build a 3D website covers where code like it lives. You need to know that anything which can be described as "for every pixel, colour it by this rule" is a shader, that shaders are fast because they run in parallel, and that a complex one running over the whole screen at high resolution is where phones start to struggle.
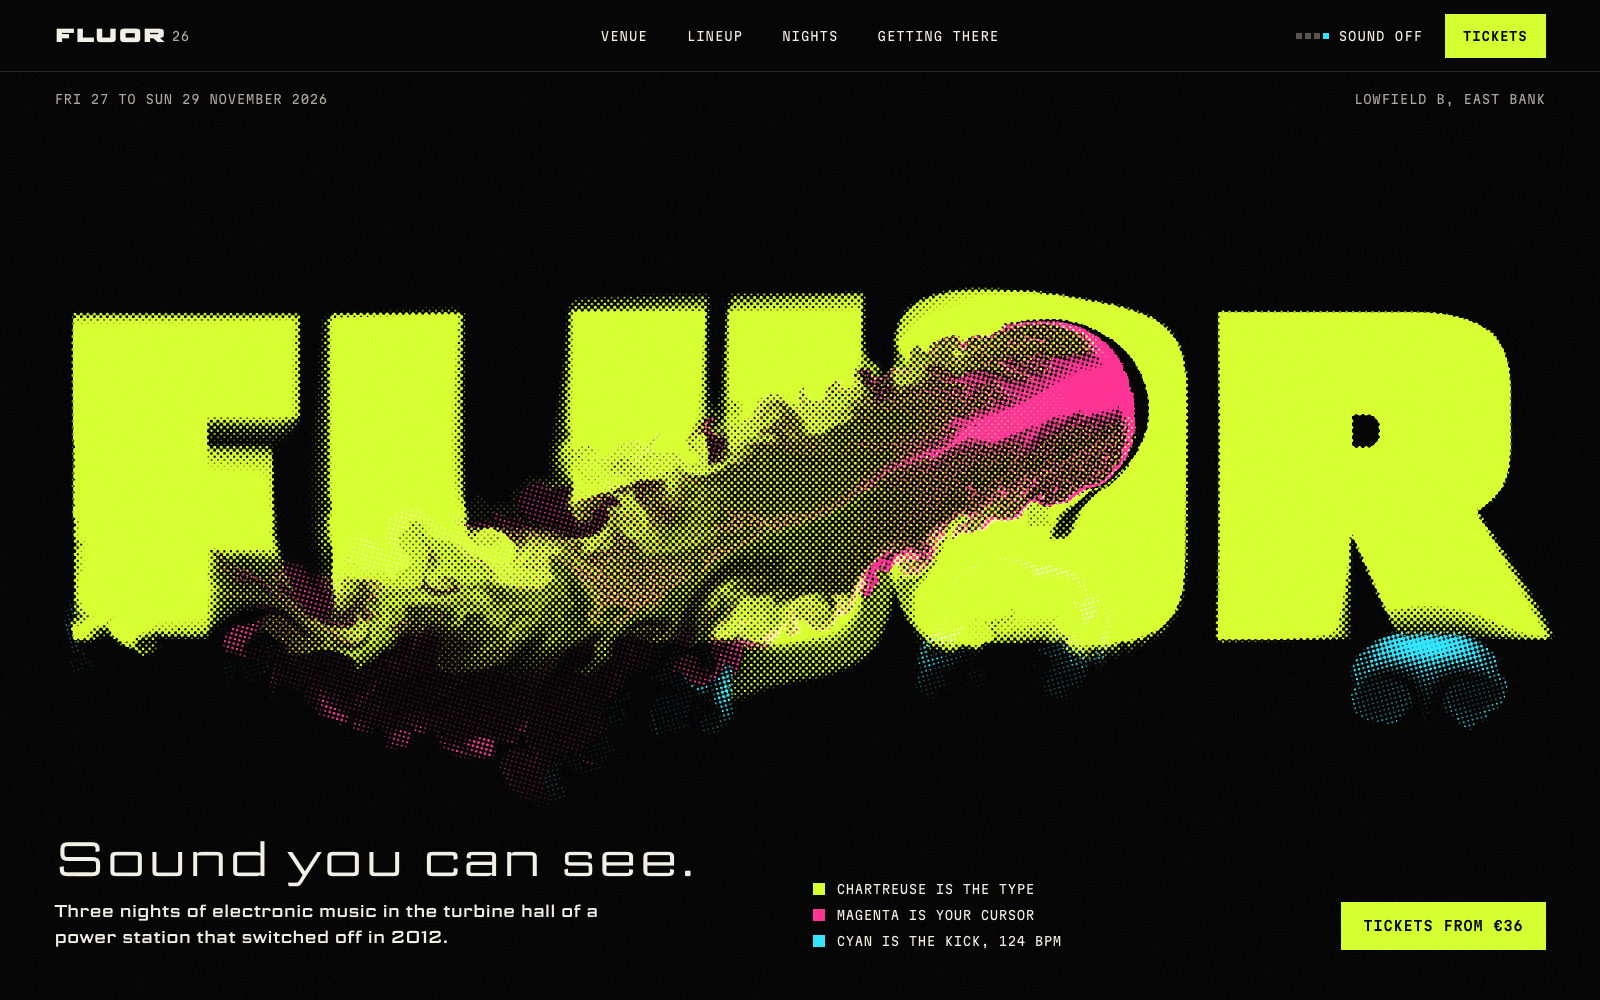
FLUOR 26, a showcase site for an imagined electronic music event, runs a fluid simulation on the graphics card: the wordmark is printed in fluorescent ink that your cursor stirs and a kick drum pushes at 124 BPM. That's a chain of shaders passing images to each other every frame, and it's the kind of effect that's impossible without WebGL.
Post-processing: the grade
Post-processing treats the rendered frame as an image and runs effects over it before it reaches the screen: bloom (glow around bright areas), depth of field, film grain, colour grading, chromatic aberration. It's the equivalent of a grade in film.
It's powerful and easy to overdo. Each effect is at least one more full-screen pass, so stack them carefully. A common sign of an amateur WebGL site is bloom and chromatic aberration on everything.
Particles, points and instancing
Particles are thousands of tiny objects drawn in one go: dust, fireflies, stars, data points. With instancing, the graphics card draws one shape thousands of times with different positions, which is cheap.

In Hortus Nocturne, a showcase site for an imagined night-garden exhibition, fireflies gather wherever you hold the cursor still, and their light lifts a photoscanned flower that colour only returns to where the light falls. Particles, a real scanned asset and a lighting rule, working as one idea.
To see these techniques running rather than described, open the showcase sites in the community. Each one can be remixed into your own project, code included.
What's cheap, what's costly
A rough guide for designers. Costs depend on the device, but the order rarely changes.
| Usually cheap | Moderate | Usually costly |
|---|---|---|
| Moving the camera | Real-time shadows | Full-screen effects at high resolution |
| Instanced particles | Glass and refraction | Many stacked post-processing passes |
| Simple materials with an HDRI | Fluid simulations at reduced resolution | Large uncompressed textures |
| Animating uniforms (colour, time) | Several detailed models | Many separate draw calls |
| Type as geometry or texture | Depth of field | Rendering when nobody can see it |
Good 3D sites spend the budget on the one moment that matters and keep everything else cheap. They also adapt: lower resolution on phones, fewer effects on slow devices, nothing rendered when the canvas is off screen. More in website performance with 3D.
How to brief a WebGL scene
Whether you're briefing a developer or a coding agent, a frame in Figma isn't enough. Describe behaviour:
- The idea in one sentence. "The record is a slab of obsidian you light and break."
- What's on stage, and where it comes from: built in code, a scan, your model.
- The material, in physical terms: "black glass, very low roughness, a warm edge of light".
- The light: studio or outdoor, warm or cool, hard or soft, where the key light sits.
- How it responds: to scroll (what changes from top to bottom), to cursor (what the pointer is), to touch (what replaces hover).
- The one unforgettable moment.
- The reduced-motion version: what still frame represents each beat.
- References, with what you like about each, not just links.
That's almost exactly the structure Laarpi's plan uses for a site's 3D centrepiece: what it is, how it answers scroll and cursor, and why it serves the story.
Vocabulary cheat sheet
| Term | In design terms |
|---|---|
| Scene graph | The layer panel: a tree of grouped objects |
| Draw call | One instruction to draw something; fewer is faster |
| UV map | How a flat image is wrapped onto a shape |
| PBR | Physically based rendering: materials described by real properties |
| HDRI | A 360° photo of light, used to light the scene |
| Uniform | A value you pass into a shader, such as time or cursor position |
| DPR | Device pixel ratio: how many pixels per CSS pixel; capping it saves a lot |
| glTF / GLB | The standard file format for 3D on the web |
| Meshopt / Draco | Compression for geometry |
| Raycasting | Working out what the cursor is pointing at in 3D |
Where Laarpi fits
Laarpi is a coding agent that writes this kind of code for you, in three.js, from a description. It asks the questions a creative director would ask, writes a plan with the 3D centrepiece spelled out, builds it with open-licensed assets and real lighting, and looks at its own screenshots, with a separate art director scoring the 3D among eight criteria. The vocabulary above is how you direct it: "rougher", "warmer key light", "less bloom", "the cursor should be the lamp". To go from understanding to building, read how to build a 3D website or see the 3D website builder.